Showing posts with label patterns. Show all posts

Monday, 11 March 2019

March Life Update; Knitting Many Things!


Hi readers, 

I'm currently really ill due to my long term illness, which I'm still in debates about writing a blog post on. Though I do feel the need to do this more and more just get some of my frustrations out! Anyway, this is a much nicer post today and it's about all the things I - and I one thing my mum made- have been knitting. Normally, I just put them into other Update posts but I've not been up to writing much lately. Though my short story a day blog is sill going - more out of habit then anything else. 

First off, let's start with the dog soft toy that's heading this post. He's so cute and snugly! He's made of Sirdar snuggly snowflake for the white bits and a soft double knit with a main brown colour and a mixed colour pattern - which didn't turn out that great- for the body but it makes him look different. I didn't give him a lot of stuffing because I wanted him soft and squidgy.

I have enough wool to make 4 or 5 more and my plan is to do one for my best friend's daughter's 1st birthday and then one each for when my brothers and their partners have kids. These doggies are so cute and simple to knit as it's all squares and rectangles. I can't wait to knit another one! 

I do like knitting baby stuff even though I'm not knitting with anyone in mind. I guess if and when I do get around to having babies all these knitted things will be useful. I think the main reason I like knitting baby stuff is because it's quick to finish things and you can knit easy or hard patterns, plus, the things are so cute! 

Booties were the first baby thing I made and I also learnt to increase with this pattern. I like to try and make different kinds of booties now. These ones below, I made in my favourite colour purple and added large star buttons to the front. I really like how they turned out. Also, making baby booties let's you practise different knitting techniques and they are super cute! 


The other baby things I like knitting is baby jackets. My mum found a real simple pattern which is just one rectangle for the back, two rectangles for the front panels and two smaller rectangles for the sleeves. There is no increasing or decreasing and it's just the plain knit stitch. Plus, its made of chunky wool so it knits real fast.

I've made a few of these jackets now and I've adapted the pattern to be made in double knit wool. My last jacket, I made out of Sirdar snuggly snowflake chunky and I decided the wool was so nice and I had many balls of it, I wanted to make it into a coat instead. With my mum's help, I learnt to add rows to make the length bigger. Once done, I also wanted to make a hood and mum helped me to that and add the little bear ears on top! To finish, large star buttons which I learnt how to make button holes for.  

I'm really happy with how this coat turned out! It looks so snuggly and warm for winter time. 


I've more wool to knit other jackets out of, including wool that is pattern to knit up like little flowers, I can't wait to try that one out! That's actually on my to do list next. 

The last thing I made and finished was this cute little bear comforter. I had problems making the head because I couldn't get the increase right. I got too frustrate with it and mum made it for me. I did the rest of it though because the ears, arms and blanket were easier. Once again it's made out of Sirdar snuggly snowflake and just snuggly for the bear bits. This bear comes from the same pattern book as the dog. 

The bear turned out well, even though I had bit of trouble with it! I'm not I'll be making another one any time soon, even though I have the wool to make a blue one. 


My mum has also been knitting baby things but of late, she's been making bits of pieces of things including a tea cosy and a regency doll's costume dress. She also made this little sheep. He come from a kit that someone give me ages ago but I can't do the little loop pattern, so mum made it instead. It took her ages because she had re-learn how to to the loop and the sheep is quite small too! 

The sheep turned out really well and mum didn't put a lot of stuffing in, so it's real squishy. There's a also a lamb in the box still to be made too, I want to say I'll have a go at making it, but I doubt it. For now this sheep is living on my bedside table and become a perfect comforter for my anxiety attacks.  


It's not just me and my mum that love wool, our dog Patch does too! She loves cuddling up to whatever wool ball we are using but the softer the better, though she's not a fan of fluffy stuff. She often sleeps between us or behind one of us whilst we knit and if the wool ever gets stuck, Patch is often the cause!  


Rainbow Blanket Project 


As part of my wool order for the Sirdar snuggly snowflake, I got this one called rainbow splash. I love all the bright colours! My first plan was to make a baby jacket/coat like I did out of the white/purple/blue mix further up in this post, but the thick strips that the rainbow colours made didn't look good. So, I decided it would make a better blanket instead, so I undid the half back of the jacket I made and began a baby/toddler size blanket. 

My first try though didn't turn out wide enough and you can see how thick the lines are in the photo above compared to the two below. I decided, despite having knitted almost a ball and half, that I did like the size of it, so once again I undid all my work and give this wool a third attempted!

This time though, I liked it better and it's wide enough now too. 


Since my re-start, I've been trying to work on this blanket as much as possible, it's been maybe around two-three months now and I have four balls left to knit in. As you can see from my recent photo, this blanket has grown! 

I really hope to get it finished by the end of this month and of course I shall post a photo when it's complete. It's getting real big now and becoming more of a toddler/child blanket then a baby's one! It'll be put to a good use in the future, I'm sure.  


That's it for this post, thanks for reading and happy knitting! 


(All photos belong to me). 


Monday, 7 March 2016

March Life Update: Getting Crafty!


Hi readers,

I've been so busy over the last few weeks, so this weekend I thought I'd take the time to have a chill. One of my favorite things to do is sewing. I love making little soft toys, key rings and coin pouches. I decided as Mother's Day was yesterday in the UK, I'd make my mum some of the stuff I'd recently been looking at for making with the young people at the youth center. I had all ready made a white bunny, a pink bunny keyring and I re-did the owl coin pouch from last month. I was so not happy with how it turned out, so I made the pattern bigger and give it another shot. It turned out a lot better!

I wanted to make cute bunnies with kids for Easter, but I need something quick and simple. These 'Giving Bunnies' met all my needs and can be found here: http://www.urbanthreads.com/blog/?p=7487. They are really easy to do, so easy in fact that you might end up with a family of them before you know it! I loved adding the bows and the knitted scarfs because it just finished them off. The love heart one was originally meant to have patchwork strips on her, but it didn't turn out as I wanted, so I cut the hearts out and sewed them on.

My mum really loved her's and now I'm hoping the kids at the youth center will do too! I brought the fabric and I went with micro-fleece instead of felt because it's softer and worked out cheaper to bulk buy. I'll be cutting out the bunnies before hand because it'll be easier and the kids just have to sew them up. I won't be knitting scarfs for them all though! But they could put other things on if they wanted.

The second bunny pattern I picked is super cute and is made up as keyring. though you could always re-size the pattern if you wanted create a soft toy or a pillow. The first one I made, I used the stitches the instructions suggested, but it wasn't neat enough for me and I found it hard to keep things the same. I decided to blanket stitch the second one -I made for my mum- and that turned out so much better. Here's the link: http://www.michaelannmade.com/2012/03/little-peep-pal-diy-with-pdf-pattern.html?utm_campaign=sniply

I think for the kids I'm not going to do the strip/gusset to make them 3D, because I found it tricky and I imagine that they'd find it far too hard and just give up. So, we'll be making them flat then stuffing them to give them a little depth instead. I got pink micro-fleece and shall be cutting them out too. I wanted to get some blue for the boys or those girls who didn't want pink and I was unable to because it wasn't half price like the white and pink and I didn't want to spend a lot of money. (I can claim my money back via the resources department, but as the youth center is a charity I always feel a bit bad about claiming money back from them). I'll offer blue felt instead, I think.


I was going to make an owl coin pouch for my mum like my re-did one, but I found this one and decided it looked a lot better; http://www.dosmallthingswithlove.com/2014/10/felt-owl-coin-purse-hidden-closure.html I love the hidden button and it turned out great. I know I should have used matching thread for the eyes, but I wanted to give it that homemade look. My mum really liked this and said she was going to put £2 coins in which she likes to collect. It also matches the bag and purse I got her at Christmas. I have half fancy making one for myself, but I really don't have need of another coin purse right now! I know I friend who might like one though....

Also, here's the one I re-did! It turned out a lot better and I can actually fit money inside of it. I added some stuffing to the wings and eyes because I didn't like how flat it looked. The pattern can be found on the same website as the other one.


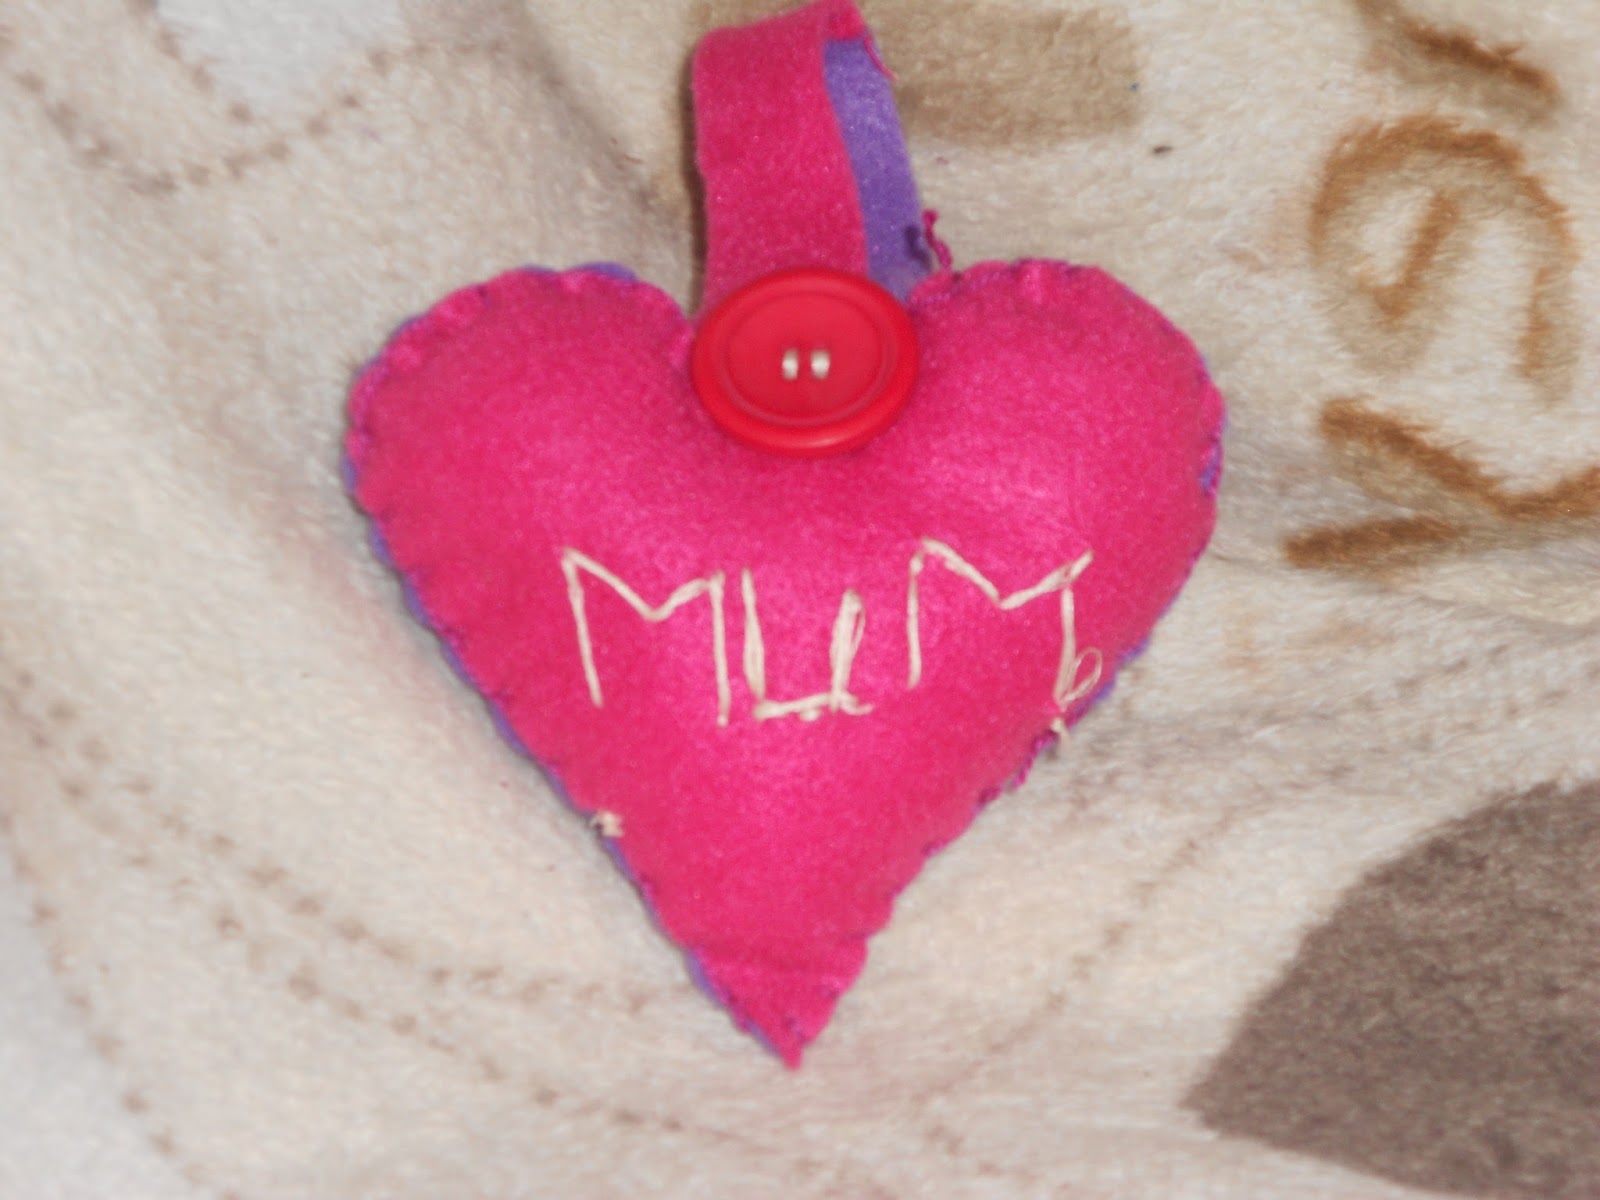
Lastly, I made this felt love heart with a hanger and stitched mum on it. I made these with the kids last Tuesday. I'd actually wanted to make mini no sew heart cushions, but I got the pattern size wrong and it only works with like A4 size, which would have meant using up too much felt at the youth center and then I know some of the kids can't tie knots, so I went for an easier option. We made these and put dried lavender and scented beads, which I had left over from ages ago when they made the scented pouches. The kids really seemed to like them. My mum likes her's too.


Today, I made a felt Pusheen kitty. The pattern has been on my desk since I printed out the other stuff and though I'm not a big fan of cats, it looked like another things to get the kids at the Factory to make. Though I'll have to make the pattern simpler because it is a little complicated. The guy's tutorial video is bad and after I watched it I just made Pusheen up as I would a normal 3D soft toy. I don't get why he cuts off the feet and stitches them and the belly on separately and the space he leaves for turning kitty the right way and stuffing is far too small!

So, if you're going to make this, I'd say watch the video to get understand where all the pieces go, then just make it up how you'd normally do. Here's the links: http://grnmarco.deviantart.com/art/Pusheen-The-Cat-Template-367261676
https://www.youtube.com/watch?v=2gckh0vI-i4

Mine turned out okay. I know I didn't get the mouth right, maybe I might change that later and yeah, I did glue all the black parts on. It was so much easier then sewing due to the fact they are small. I think for the kids, I'd just get them to make it flat or with just the belly gusset. Doesn't the little tail look so cute though?


The second part of update post is that I finally got around to making two pieces of art! I'm no artist, in fact I'm super bad at drawing and art as a whole. I know I do a lot of arty stuff with the kids, but it's normally simple easy stuff. I saw these two projects on Pinterest and decided that I wanted to give them ago even if I didn't do them at the factory.

The first is this sun catcher photo frame where you use food coloring and glue to paint on the glass. I thought it looked very effective and easy for the kids to do. It can be found here: http://www.smartschoolhouse.com/diy-crafts/stained-glass-art#_a5y_p=3565407 I won't be using mine as sun catcher as I've not got any place to really put it at the moment. I just like it in the frame, it looks really pretty, though of course of the sun coming through it'd light up real nice. I also thought it'd be a great way to use up old photo frames - if anyone's got any laying around. I can image the kids getting very hands on with doing this! They love making messes!

Mine was still wet this morning and the red -maybe I used to much? - had really bled into the other colors. I only used red, yellow, orange and blue, but they seemed to have mixed together too much. I've put it on the heater to finish drying now, but I'm thinking maybe I might try again and not add red. Though then I'd have another photo frame that I couldn't really put anywhere! I'm thinking you could do this was glass paints and glitter glue too and that's probably what I'll use with the kids because my fingers are now stained red...


The next thing is my button tree! I've been talking about doing this since last September/November and yesterday, I decided it was time to make it. Unfortunately, the image I'd picked to copy, I can't find anywhere! It was a purple and pink dripping together background with the tree in the center. I had to use this one instead http://craftsbyamanda.com/vibrant-button-tree-on-canvas-a-giveaway, but of course I didn't make mine look like that because it seemed to take on a life of it's own...

I'm okay with how it turned out, but I wish I'd made the tree trunk smaller and got more branches and leaves/buttons at the top. I'm sure it'll look fine on my wall though, which is what I wanted it for. As a DIY art piece it was cheap to make. I got the canvas for £3 as it was on sale, the paint was £1 a bottle, I used four bottles as I added some black glitter paint on top and I used some for the paint before to make the Halloween/Christmas jars. The buttons I paid £4 for 200 grams off Amazon and I've LOT left over! So, it was about £11 all together and it took me about 3 hours to make including paint drying time. The buttons need over night to dry, of course. I might look at making another one or I've seen like four canvas together to make the four seasons and I really like the look of that. I need more wall space first though!


So that's everything I've been up to, but I got one last thing to share for today. A few weekends back now, I saw this knitting pattern for a whale in one of my mum's knitting magazines and I just fell in love with him and had to have him. We got the wool really cheap and he only took a weekend to make up. I love him so much and use him as a body pillow. He's like 3 foot long and takes up a quarter of my single bed! I swear I've been sleeping better with him too. He's got a snugly underside and the top of him is getting softer the more I rest my head on him. This photo doesn't really show how huge he is, but he's taking up two seats on the corner sofa and that was the only place I could find to put him for the photo!


Currently, my mum is knitting me a sparkly purple triceratops. I was hoping she'd be finished in time to write and show today, but mum didn't want to mess up the last of the horns and sewing her together, so I'll have to wait. Though that's okay because I've got a felt stegosaurus to make. I really wanted to make a felt triceratops but couldn't find any free patterns and the cheapest ones to download still seemed expensive to me when I could have a go at making my own. As it turned out, mum got the knitted pattern for free and I decided I liked it so much that it'd do instead.

So that's all for now. Thanks for reading. Next week is meant to be a book review, but I only just finished The End Of Days, so I'm not sure what'll pick up to read tonight. In the mean time please check out my other blog, where a write a short story everyday.

Links:

For the patterns;
http://www.urbanthreads.com/blog/?p=7487
http://www.michaelannmade.com/2012/03/little-peep-pal-diy-with-pdf-pattern.html?utm_campaign=sniply
http://www.dosmallthingswithlove.com/2014/10/felt-owl-coin-purse-hidden-closure.html
 http://grnmarco.deviantart.com/art/Pusheen-The-Cat-Template-367261676
https://www.youtube.com/watch?v=2gckh0vI-i4
http://www.smartschoolhouse.com/diy-crafts/stained-glass-art#_a5y_p=3565407
http://craftsbyamanda.com/vibrant-button-tree-on-canvas-a-giveaway/

Me on Pinterest: https://uk.pinterest.com/hails9/
My other blog, The Story Files: https://thestoryfiles.wordpress.com/

Photos:
All my own.